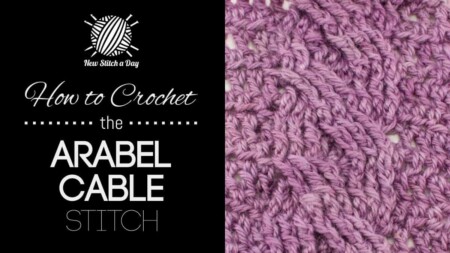
This crochet tutorial will help you learn how to crochet the tulip cable stitch. This stitch creates a delicate fun cable pattern. The tulip cable stitch would be great for sweaters, shrugs, and scarves!
Tr/rf”]Raised Treble Crochet at the Front of Fabric – wrap the yarn around the hook, insert hook from in front and from right to left around the stem of the appropriate stitch, and complete the stitch normally
tr/rb”]Raised Treble Crochet at the Back of Fabric – wrap the yarn around the hook, insert the hook from behind and from right to left around the stem of the appropriate stitch, and complete the stitch normally
FCL”]Forward Cluster – leaving last loop of each st on hook, work 1dc into next st and 1tr/rf or rb around next st after that, ending yo, draw through all 3 loops on hook.
BCL”]Backward Cluster – leaving last loop of each st on hook, work 1tr/rf or rb around st below dc just made and 1dc into next st.
TCL”]Triple Cluster – leaving last loop of each st on hook work, 1tr/rf around st below dc just made. 1dc/rf around next Puff st, and 1tr/rf around next st, ending yo, draw through all 4 loops on hook
Stitch Pattern Details
Skill Level
Intermediate
Row Repeat
6
Stitch Repeat
Worked over 15 sts
Stitch Pattern Instructions
Worked over 15 sts
Note Raised legs of these clusters are to be worked at front (rf) on right side rows and at back (rb) on wrong side rows as indicated in text: FCL/rf, FCL/rb, BCL/rf, BCL/rb.
Row 1: (Right Side): 1tr/rf around next st, 1dc into next st, 1tr/rf around next st, 1dc into each of next 2 sts, [1FCL/rf] twice, 1dc into next st, [1BCL/rf] twice, 1dc into each of next 2 sts, 1tr/rf around next st, 1dc into next st, 1tr/rf around next st.
Row 2: [tr/rb around next st, 1dc into next st] twice, [1FCL/rb] twice, 1dc into each of next 3 sts, [1BCL/rb] twice, [1dc into next st, 1tr/rb around next st] twice.
Row 3: [1tr/rf around next st, 1dc into next st] twice, 1tr/rf around each of next 2 sts, 1dc into each of next 3 sts, 1tr/rf around each of next 2 sts, [1dc into next st, 1tr/rf around next st] twice.
Row 4: 1tr/rb around next st, 1dc into next st, 1tr/rb around next st, 1dc into each of next 2 sts, [1BCL/rb] twice, work a Puff st of hdc5tog all into next st, [1FCL/rb] twice, 1dc into each of next 2 sts, 1tr/rb around next st, 1dc into next st, 1tr/rb around next st.
Row 5: 1tr/rf around next st, 1dc into next st, 1tr/rf around next st, 1dc into each of next 3 sts, 1BCL/rf, 1TCL, 1FCL/rf, 1dc into each of next 3 sts, 1tr/rf around next st, 1dc into next st, 1tr/rf around next st.
Row 6: *1tr/rb around next st, 1dc into next st, 1tr/rb around next st**, 1dc into each of next 9 sts, rep from * to **.
Repeat rows 1-6 until you have reached your desired length.
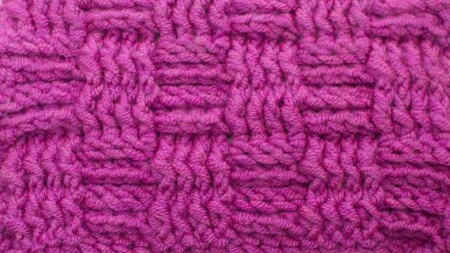
Stitch Pattern Swatch Photos
Example of the Tulip Cable Stitch. Reversible (Click for Larger Image)